Creating Templates - Field Codes
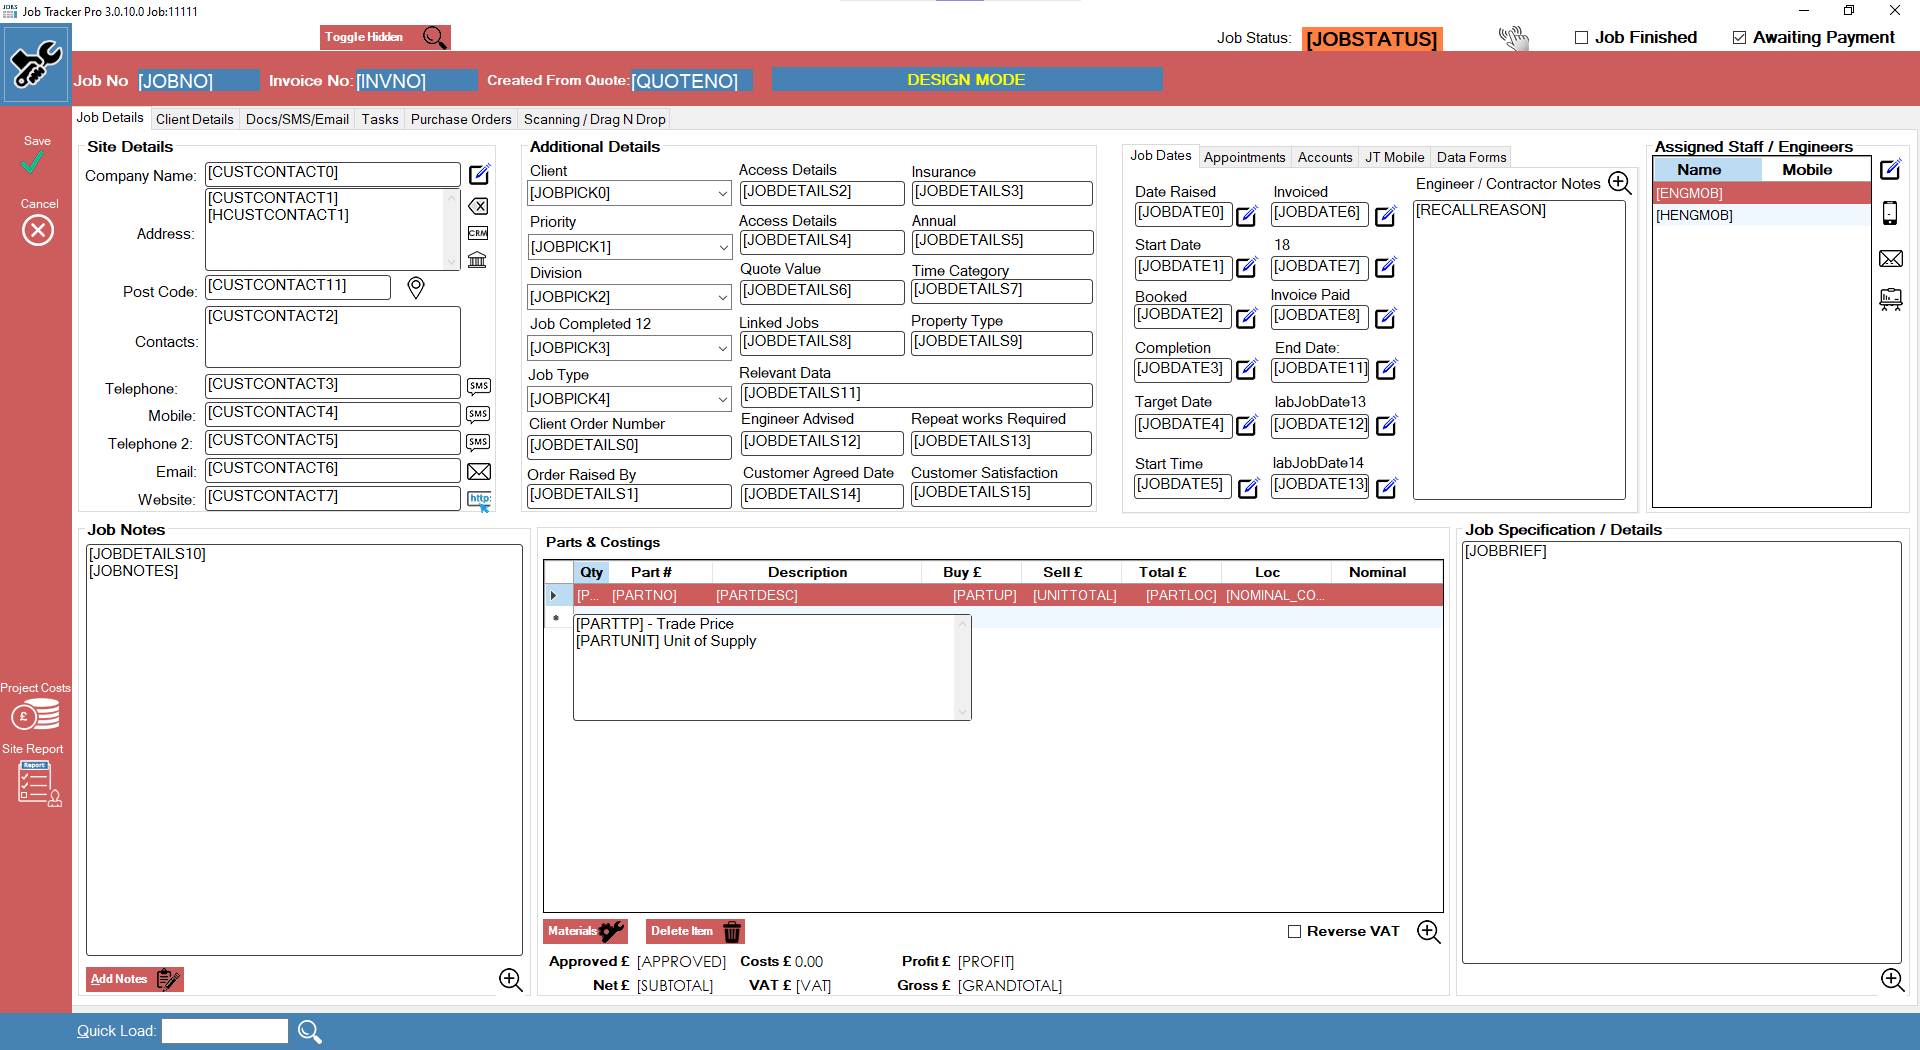
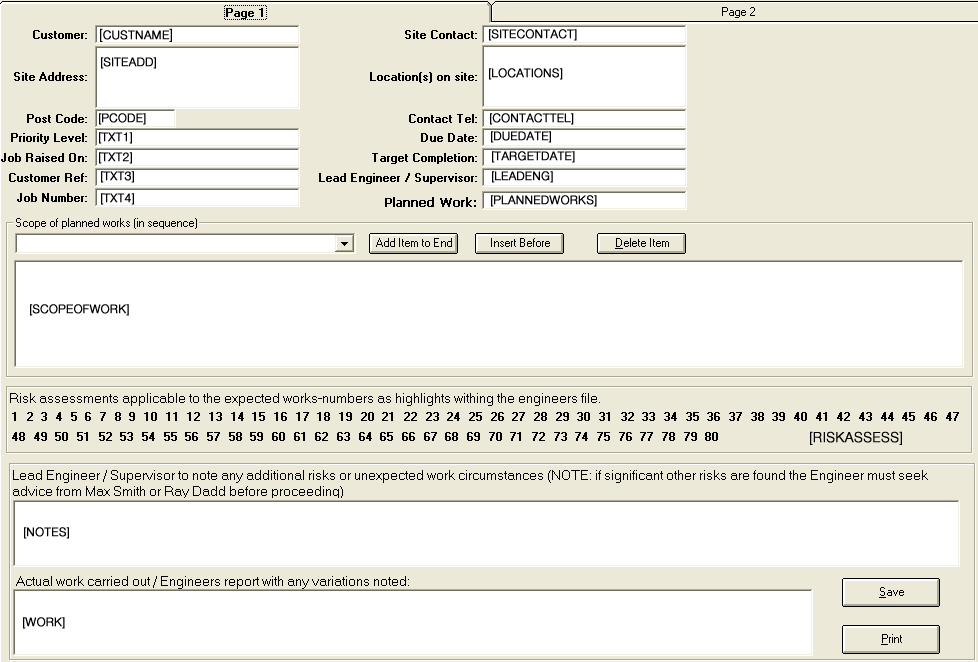
Job (Site / Customer Label)
click here to view the older version of the job screen.
TIP - As the job screen is customisable, it is possible that the position of the fields in the example image below, differ from yours.
To find the code you need:- access the job screen in Job Tracker, press ctrl and left mouse click the spanner at the top left of the screen. This will place the screen into edit mode and all field codes for visible fields will be displayed.
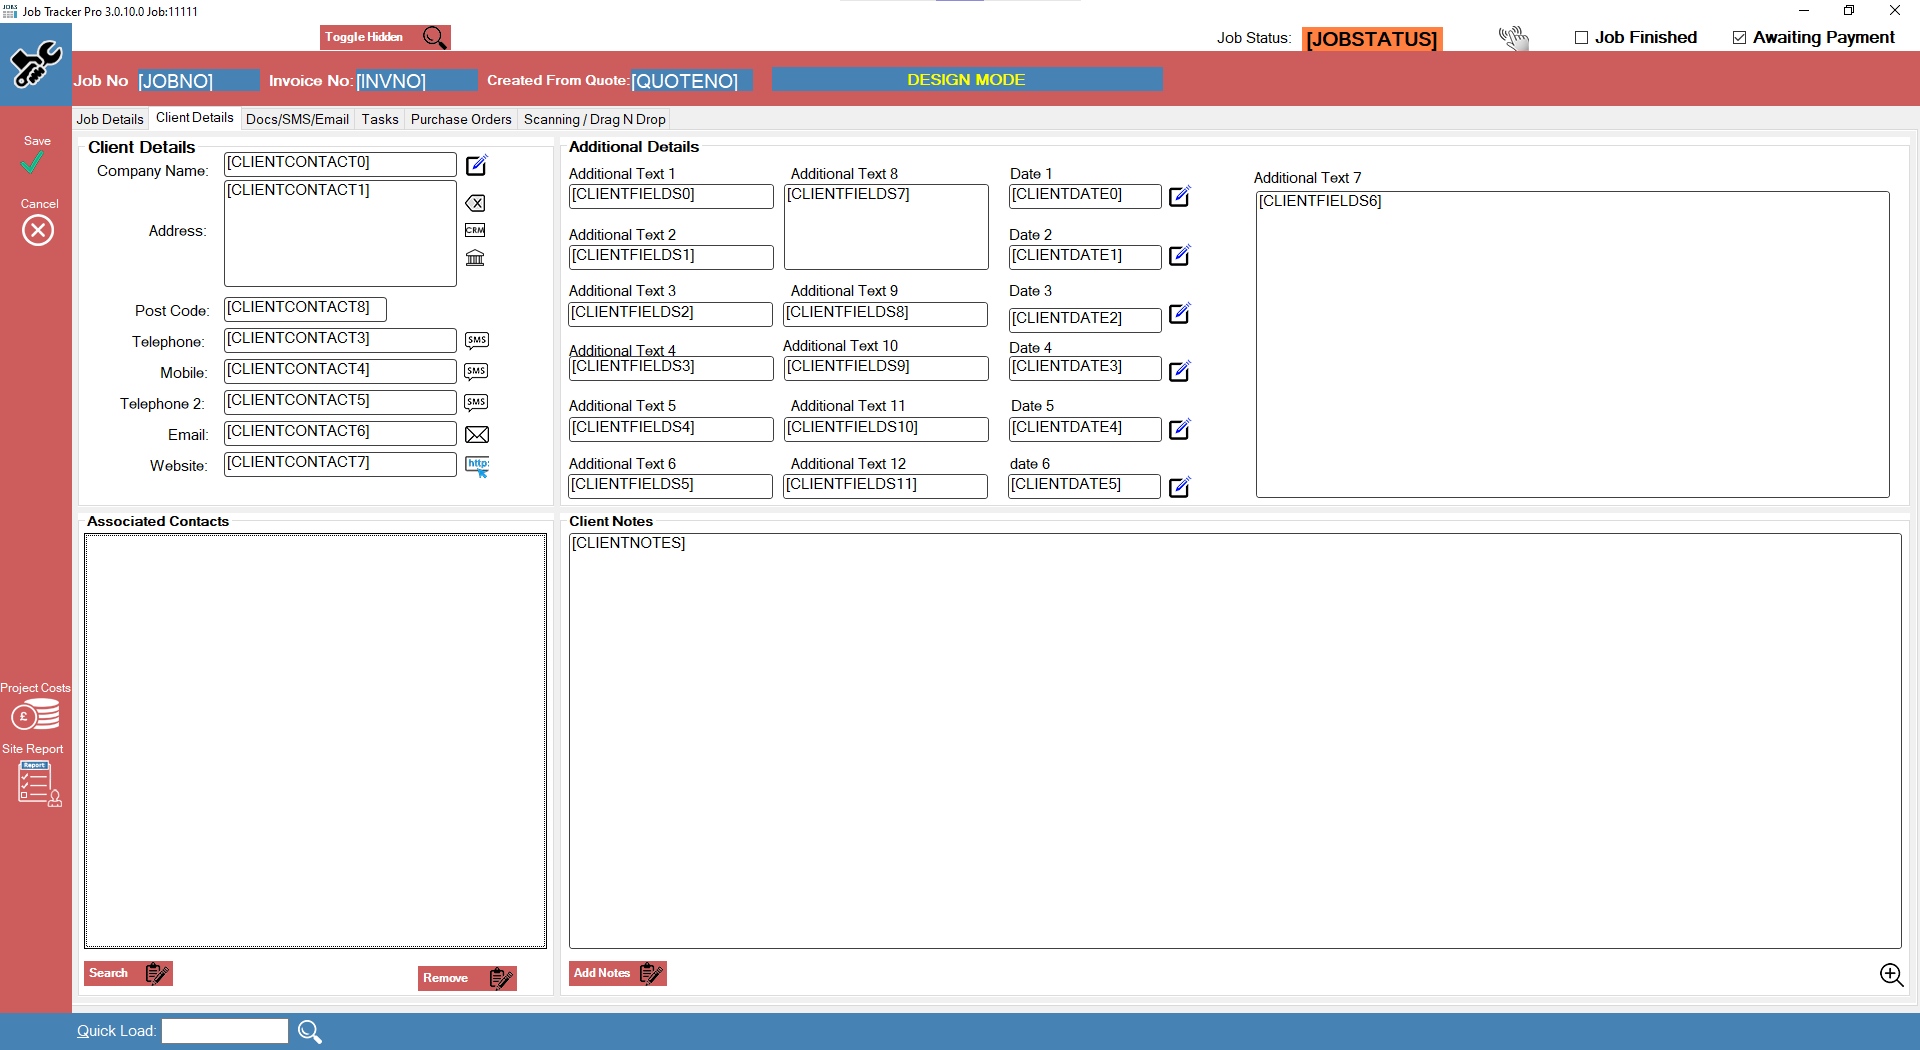
Job (Client Labels)
click here to view the older version of the job screen client tab.
Estimate Template Codes
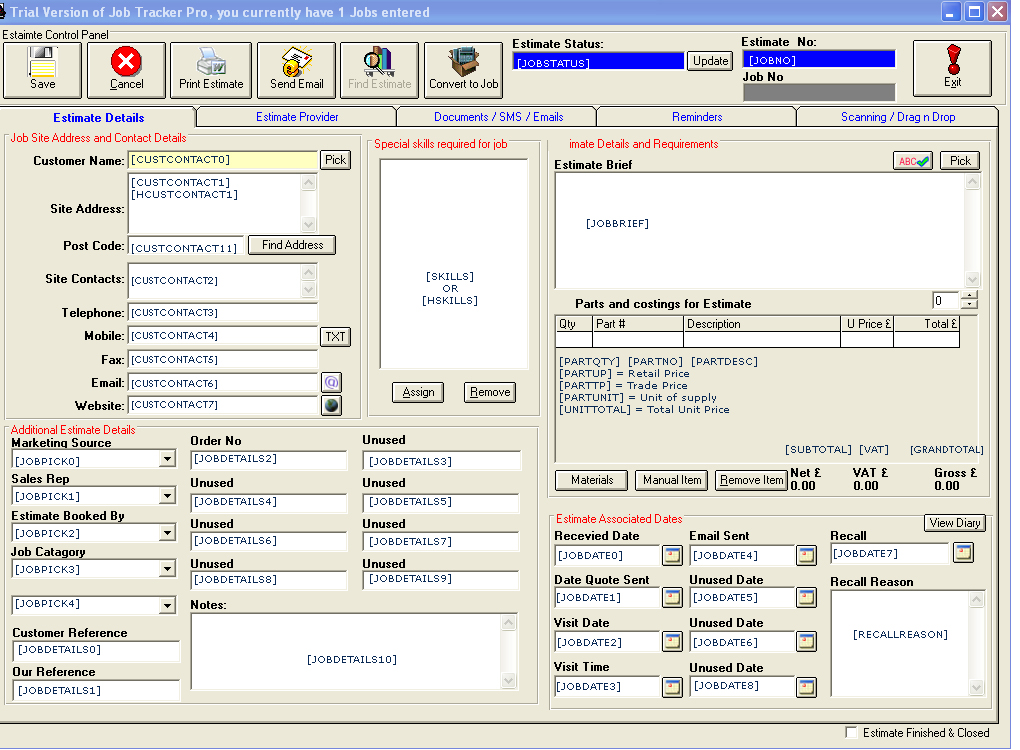
The Estimate Provider Tab codes are the same as the Job Screen, Client Details Tab.
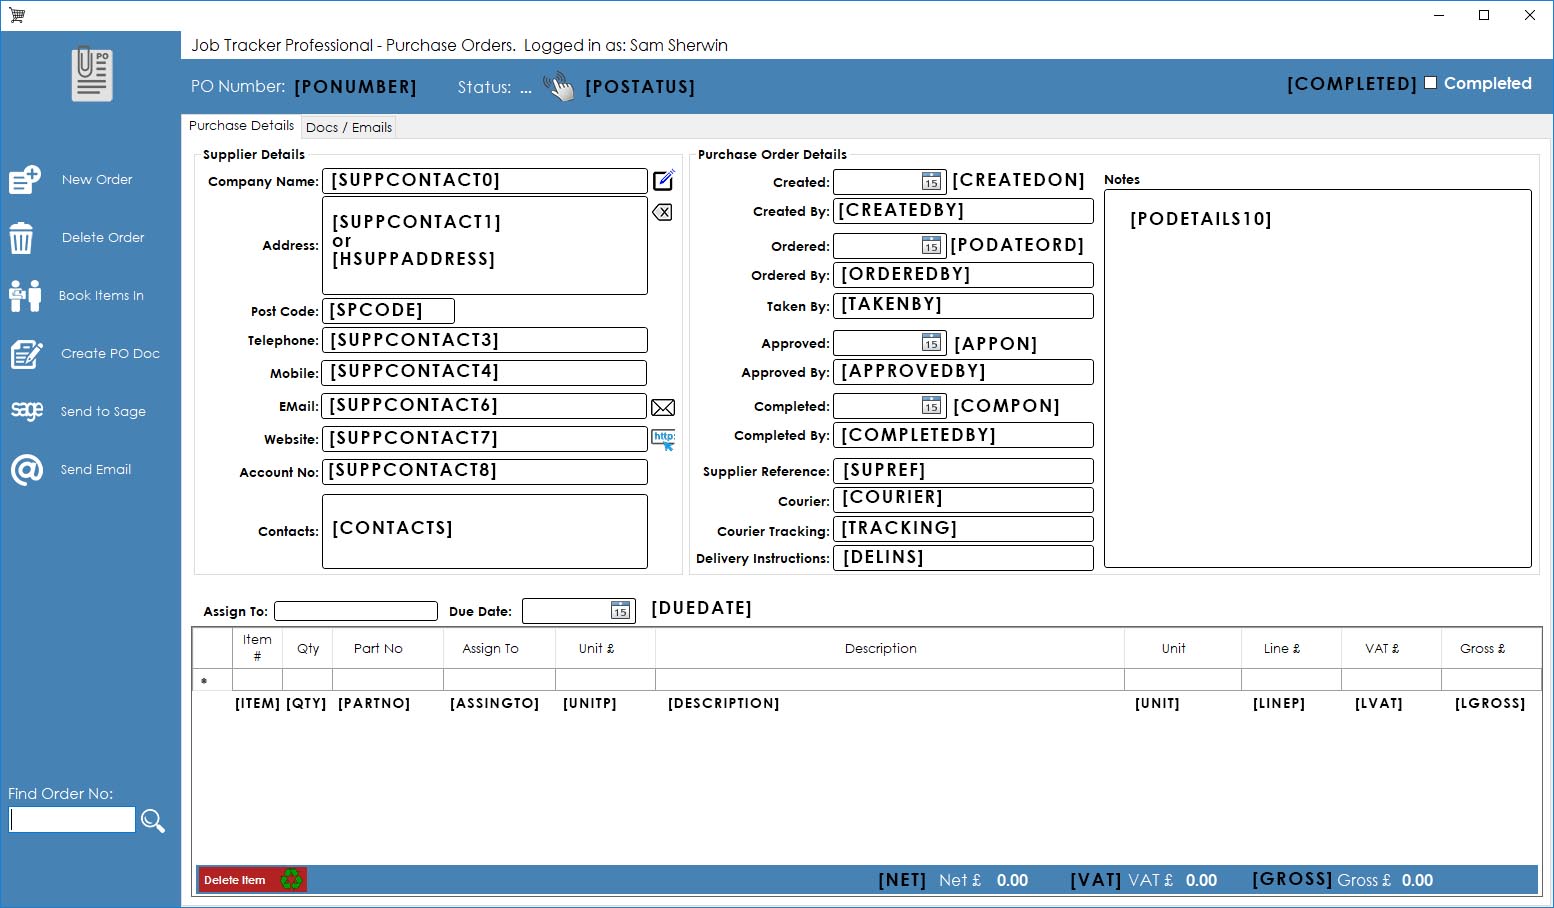
Purchase Order Labels
click here to view the older version of the Purchase Order screen.
Invoices - Additional Fields for use with Excel Invoices
All the codes from the Job Screen can be used on Excel Templates as well.A few extra templates codes for use with invoicing are as follows:- [SITEADDRESS] [CLIENTADDRESS] [INVNO] The Invoice number
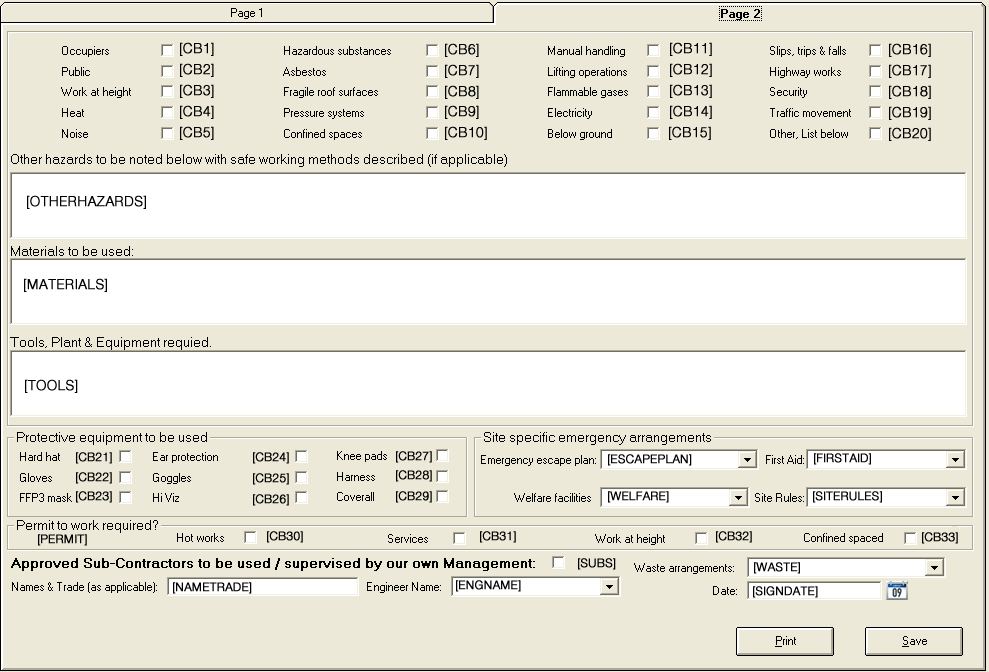
Health & Safety Document Codes
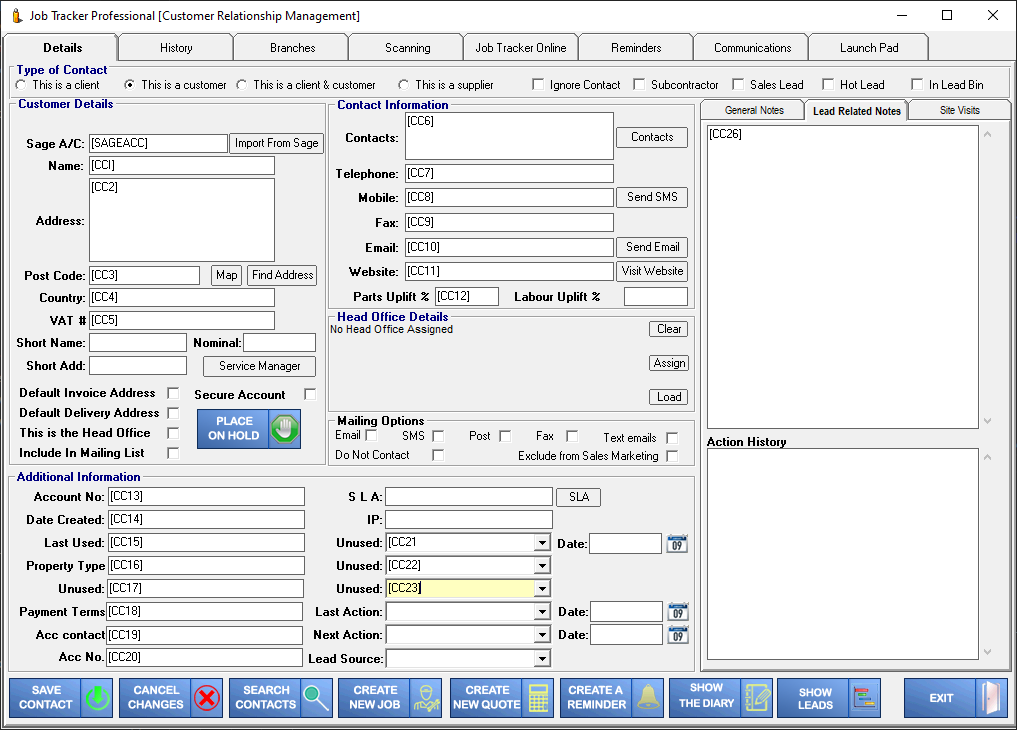
Contacts Screen Field Codes
Attaching Images From the Filing Cabinet
Using the field code [SCAN_"folder name"] you can automatically insert in your template document any appropriate jpeg images.
Within the job filing cabinet (within the scanning / Drag N Drop tab), create a folder to store relevant JPEG images.
Do not add any other file type as this will cause this function to fail.
Name the folder, then use that folder name in your template file within the field code [SCAN_folder name]
The size of the imported images can be set / altered via program settings.
A default value already exists but to change this, access the Control Panel, click the Program Features Tab, Click Program Settings.
At the top Left of the program settings screen there is a section labelled Printing Images.
Here you can set the pixels for height and width, click save and exit.